Valentines Snacks Mini Puff Pastries
Highlighted under: Dessert Corner
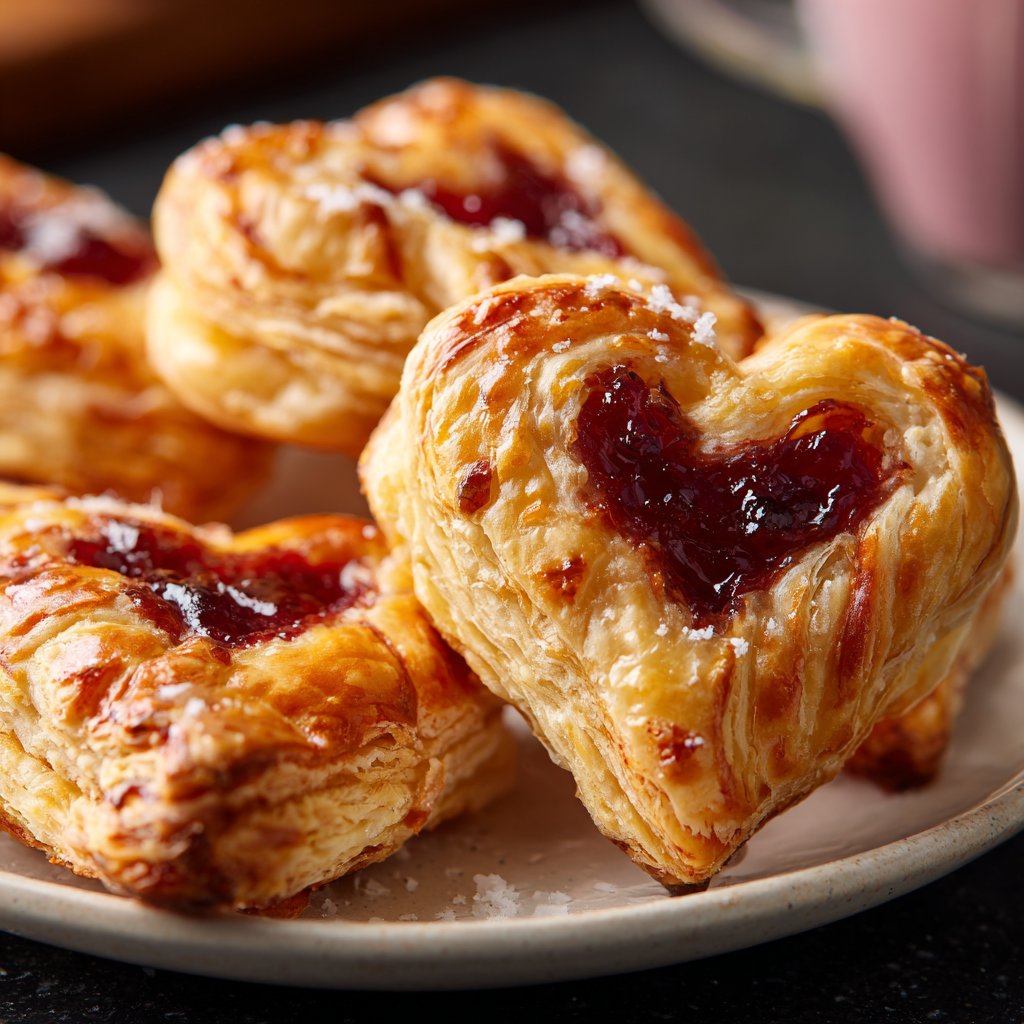
I love making these Mini Puff Pastries for Valentine's Day! They are not only adorable and bite-sized, but they are also incredibly simple to prepare. Using store-bought puff pastry saves time without compromising on taste. I fill them with a mix of sweet cream cheese and fresh fruit or chocolate, ensuring each bite is delightful. Whether I'm hosting a small gathering or just surprising my partner, these pastries always impress with their flaky layers and lovely presentation.
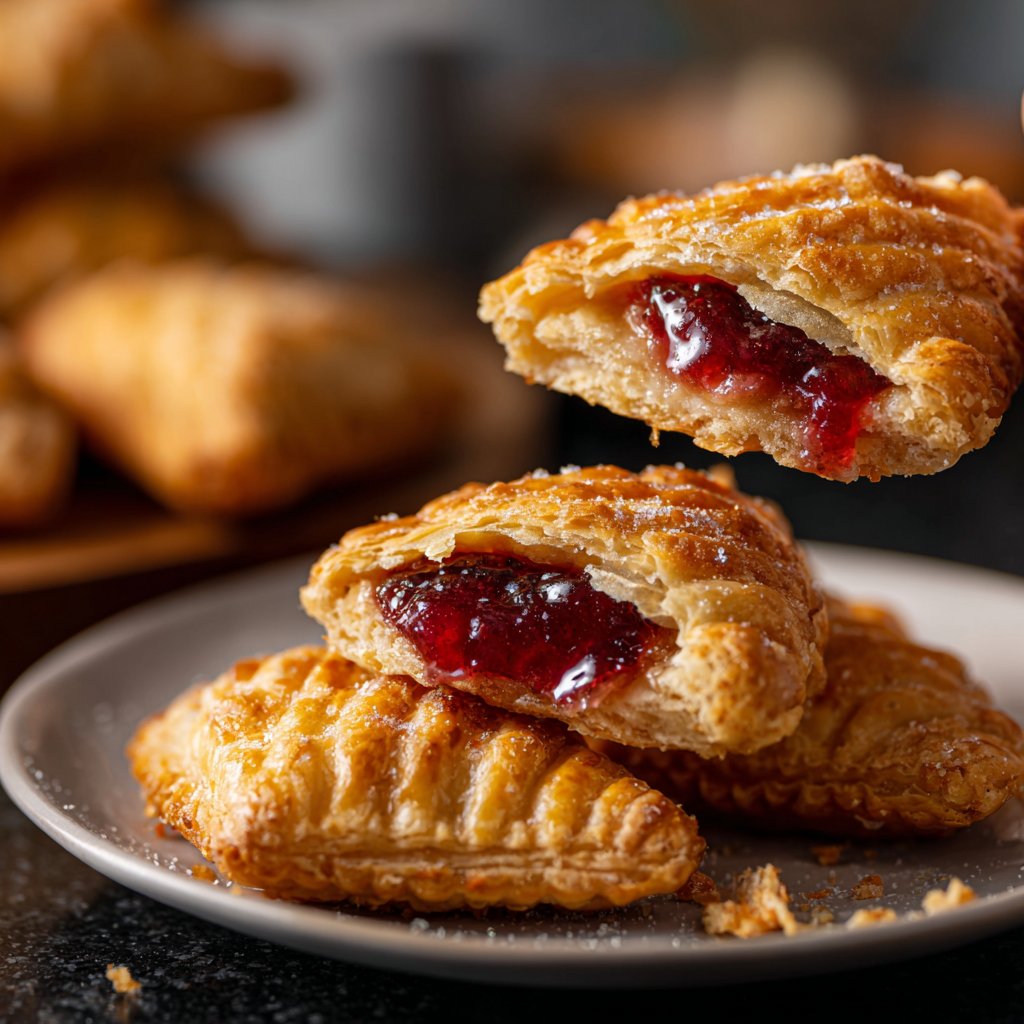
When I first made these Mini Puff Pastries, I was blown away by how quickly they came together. I experimented with different fillings, and the cream cheese mixed with a bit of powdered sugar and vanilla quickly became my favorite. This mixture spreads beautifully and complements the puff pastry's buttery texture perfectly.
To ensure the pastries puff up beautifully, I always recommend keeping the pastry cold until right before baking. A quick brush of egg wash not only gives them a golden color but also helps seal in the filling. Trust me, the aroma of these puff pastries baking will have everyone flocking to the kitchen!
Why You Will Love This Recipe
- Flaky, buttery texture that melts in your mouth
- Customizable with your favorite sweet or savory fillings
- Quick to prepare, making them perfect for last-minute gatherings
Perfecting the Puff Pastry
The key to achieving that irresistibly flaky texture lies in how you handle the puff pastry. Make sure your surface is well-floured to prevent sticking, and roll out the pastry evenly to about 1/8 inch thick. This thickness allows the layers to expand properly while baking, creating those beautiful flaky layers we all love. Remember, if the pastry gets too warm, pop it back into the refrigerator for a few minutes to maintain its integrity. This step is crucial for that perfect rise in the oven.
When cutting the puff pastry into squares, aim for uniformity to ensure even baking. If your squares are too large, the filling might overwhelm them, resulting in difficulty sealing the edges. Consider using a sharp knife or pizza cutter for clean edges, and avoid pressing down hard on the dough, which can hinder the puffing process. Taking these details into account can dramatically elevate the final result.
Flavor and Filling Variations
While this recipe features sweet cream cheese and fresh fruit, don’t hesitate to get creative with your fillings. Consider using mascarpone for a richer flavor or adding a dash of lemon zest to the cream cheese mixture for brightness. For a savory twist, try incorporating spinach and feta, or herb-infused cheeses which pair beautifully with the flaky pastry. Remember to balance the flavors, ensuring the filling complements rather than overwhelms the lightness of the puff pastry.
If you're short on fresh fruit, frozen berries can work well too; just make sure to thaw and drain them to avoid excess moisture that could sog up the pastry. Alternatively, a sprinkle of cinnamon or nutmeg on the filling can enhance the sweetness and make your pastries feel even more special. Experimenting with flavored chocolate chips or nut butter in the filling can also give your pastries a unique personality.
Ingredients
Gather the following ingredients to create delightful Mini Puff Pastries:
For the Pastries
- 1 package of puff pastry (thawed)
- 1 egg (for egg wash)
- Flour (for dusting)
For the Filling
- 8 oz cream cheese (softened)
- 1/4 cup powdered sugar
- 1 tsp vanilla extract
- Fresh fruit (like strawberries or raspberries) or chocolate chips
Make sure you have everything ready before you begin!
Instructions
Follow these easy steps to create your Mini Puff Pastries:
Prepare the Pastry
Preheat your oven to 400°F (200°C). On a lightly floured surface, roll out the thawed puff pastry until it's about 1/8 inch thick. Cut out small squares, about 3 inches each.
Make the Filling
In a mixing bowl, combine the softened cream cheese, powdered sugar, and vanilla extract until smooth. If using fruit, chop it into small pieces.
Fill and Assemble
Place a small spoonful of the cream cheese mixture and a few pieces of fruit or chocolate chips in the center of each pastry square. Fold the pastry over into a triangle and press down the edges to seal. Use a fork to crimp the edges.
Bake
Brush the tops with beaten egg for a golden finish. Arrange on a baking sheet lined with parchment paper and bake for 15 minutes or until puffed and golden brown.
Cool slightly before serving and enjoy!
Pro Tips
- For an extra touch, dust the cooled pastries with powdered sugar before serving. You can also experiment with savory fillings like cheese or herbs for a different flavor profile!
Make-Ahead and Storage Tips
One of the best aspects of these mini puff pastries is their make-ahead potential. You can prepare the pastry squares and filling in advance, storing the squares in the refrigerator for up to a day, while the filling can be prepped and kept in an airtight container. When ready to bake, simply assemble them as directed and pop them in the oven. For an extra touch of convenience, you can freeze the assembled pastries before baking. Just ensure they're arranged in a single layer on a baking sheet, freeze until solid, and then transfer them to a freezer-safe bag for up to a month.
After baking, if you find yourself with leftover pastries, store them in an airtight container at room temperature for up to two days. However, for best results, consider reheating them in the oven at 350°F for about 10 minutes to restore their golden crispiness. Microwaving can turn them soggy, so it's best to avoid that method if you want to maintain their delightful texture.
Serving Suggestions
These mini puff pastries are incredibly versatile and can be served in a variety of ways. Present them on a beautiful platter alongside fresh berries and perhaps a drizzle of chocolate sauce for a more elegant touch. For gatherings, pairing these pastries with a selection of cheeses and nuts can elevate a simple snack into a delightful spread that guests will enjoy exploring.
For a special Valentine’s Day touch, consider dusting the finished pastries with powdered sugar or serving them with a side of whipped cream infused with vanilla. This addition offers a delightful contrast and can turn your snack into a dessert experience. Whether enjoyed as a romantic treat or part of a larger spread, the presentation will wow your loved ones!
Questions About Recipes
→ Can I use frozen puff pastry?
Yes, frozen puff pastry works wonderfully! Just ensure it's properly thawed before use.
→ What are some filling suggestions?
You can use sweet fillings like fruit, chocolate, or custard, or savory options like cheese, ham, or spinach.
→ How do I store leftover pastries?
Store any leftovers in an airtight container in the fridge for up to 2 days. Reheat in the oven for the best texture.
→ Can I make these ahead of time?
Yes, you can prepare the pastries and fillings in advance, then assemble and bake just before serving.
Valentines Snacks Mini Puff Pastries
Created by: Harper Collins
Recipe Type: Dessert Corner
Skill Level: Beginner
Final Quantity: 12 pastries
What You'll Need
For the Pastries
- 1 package of puff pastry (thawed)
- 1 egg (for egg wash)
- Flour (for dusting)
For the Filling
- 8 oz cream cheese (softened)
- 1/4 cup powdered sugar
- 1 tsp vanilla extract
- Fresh fruit (like strawberries or raspberries) or chocolate chips
How-To Steps
Preheat your oven to 400°F (200°C). On a lightly floured surface, roll out the thawed puff pastry until it's about 1/8 inch thick. Cut out small squares, about 3 inches each.
In a mixing bowl, combine the softened cream cheese, powdered sugar, and vanilla extract until smooth. If using fruit, chop it into small pieces.
Place a small spoonful of the cream cheese mixture and a few pieces of fruit or chocolate chips in the center of each pastry square. Fold the pastry over into a triangle and press down the edges to seal. Use a fork to crimp the edges.
Brush the tops with beaten egg for a golden finish. Arrange on a baking sheet lined with parchment paper and bake for 15 minutes or until puffed and golden brown.
Extra Tips
- For an extra touch, dust the cooled pastries with powdered sugar before serving. You can also experiment with savory fillings like cheese or herbs for a different flavor profile!
Nutritional Breakdown (Per Serving)
- Calories: 240 kcal
- Total Fat: 16g
- Saturated Fat: 9g
- Cholesterol: 45mg
- Sodium: 150mg
- Total Carbohydrates: 20g
- Dietary Fiber: 1g
- Sugars: 5g
- Protein: 3g